
Kayleen Christian
/
3D Animator

Hadiah untuk Mama
(Gift for Mom)
A 3-minute 15-second animated short film created over six months for audiences of all ages. I independently completed the entire visual production, from pre-production to post-production.
The film is currently being submitted to film festivals and is not yet available for public viewing.

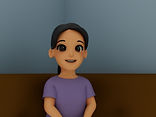


Inspiration and Ideas
From the start, my goal was simple: to create a short film set in my home country, Indonesia. Rather than focusing on a specific cultural message, I wanted to tell a story with universal themes of love, appreciation, and the small moments that strengthen family relationships. Hadiah untuk Mama (Gift for Mom) is inspired by a personal childhood memory, which I adapted into an original story suitable for animation.
Storyboard and Animatic
Once the concept was approved by my supervisors, I began developing the storyboard, followed by the animatic. I created several versions of both over a period of 2–3 months to refine the pacing, shot composition, and storytelling, ensuring the narrative was as clear and engaging as possible.


The final animatic included temporary music and sound effects to establish the timing and rhythm of each shot before production began. Both the storyboard and animatic were created using Toon Boom Storyboard Pro.


Character Design, Modelling, and Texturing
I created the two main characters for the film: the Girl and the Mom. As the film is intended for audiences of all ages, I wanted the designs to feel warm, approachable, and family-friendly while subtly reflecting an Indonesian identity.
Both characters were modelled in Autodesk Maya using the 2D concept art as image plane references. During the modelling process, I carefully considered edge flow and topology to ensure the models were suitable for rigging, deformation, and UV mapping.
The Girl's T-shirt was inspired by the shawl traditionally worn around the waist by Indonesian dancers, while her shorts feature a batik-inspired pattern. The Mom's T-shirt draws inspiration from the colourful tie-dye Barong T-shirts commonly found in Bali, and her shorts incorporate a kamboja (frangipani) flower motif, a symbol closely associated with the island.
The textures were created in Substance Painter, where I combined hand-painted details with stylised materials to complement the film's warm and playful visual style.

Character Rigging and Skinning
I rigged both characters with the help of Advanced Skeleton. Since I worked individually throughout the project, using Advanced Skeleton allowed me to save time during the rigging process while still creating a reliable animation rig.
I began by placing the joints on each character and adjusting them according to the character’s proportions and height. I carefully positioned the joints around areas where the anatomy would naturally bend, such as the shoulders, elbows, knees, torso, and neck, to ensure proper deformation during animation. Because Advanced Skeleton did not automatically generate joints for the hair, I created an additional joint chain for the hair and parented it to the main skeleton hierarchy.
After confirming that all joints were correctly positioned, I used the Build Advanced Skeleton function to generate a temporary rig and test whether the controllers moved properly with the pre-placed joints. Once I was satisfied with the setup, I proceeded to the skinning stage.
Throughout the rigging process, I saved a new version of the file before making major changes to maintain backup copies in case any issues occurred. The initial skinning process worked reasonably well, but I encountered several deformation problems with the skin weights. The arms and legs did not bend correctly, the torso and neck produced unnatural deformations, and some smaller areas also required adjustment. I used Maya’s Paint Skin Weights tool to refine the problematic areas on one side of the character, then mirrored the skin weights to the opposite side to keep the process faster and maintain consistent results. After these adjustments, the body rig was successfully finalized.
I also used Advanced Skeleton to create the facial rig. Because I had already prepared the character topology carefully during the modelling stage, setting up the facial rig was much easier. I only needed to assign the correct facial regions to each control set, including the forehead, eyebrows, eyes, nose, cheeks, jaw, chin, mouth, and other supporting areas. Advanced Skeleton then automatically generated the facial rig and its controllers. This stage required minimal additional skin-weight adjustments.
Advanced Skeleton provided reliable controllers for most anatomical areas. However, some controllers were either too small or too large for comfortable use. As a final step, I adjusted the scale of these controllers and changed their colours where necessary, making the rig clearer and more comfortable to use during the animation stage.


Environment Design, Modelling, and Texturing
The film features four main environments: the bedroom, kitchen, shop corner, and alleyway. Each environment was modelled in Autodesk Maya using the 2D designs from the animatic as references.
Before modelling, I scaled the environments by matching the props and architecture to the characters' heights. I also used Maya's measuring tools to maintain consistent real-world proportions, working to a scale of 1 Maya unit = 10 cm.
To complement the film's stylised visual direction, I kept the models simple and cartoon-like rather than highly realistic. I applied bevels to most objects to soften sharp edges and carefully considered the topology to ensure the assets were clean, efficient, and suitable for production.
Once the modelling was complete, all environment assets were textured in Substance Painter.


Prop Modelling, Rigging, and Texturing
The film features a variety of props that interact with the Girl throughout the story, several of which required rigging. I modelled all of the props in Autodesk Maya and textured them in Substance Painter.
For the rigged props, I used Maya's non-linear deformers to create the required deformations and adjusted their settings to achieve the desired movement. I then created custom control curves and used the Set Driven Key tool to connect the controls to the deformers. By keying the control curves' translate and rotate attributes, I was able to drive properties such as curvature, creating animator-friendly controls.


Animation
Before animating, I assembled each scene by setting up the environments, characters, props, and cameras to closely match the animatic. I also created an Excel shot tracker that documented each scene, shot, frame range, timecode, character actions, emotions, and intended audience response. This served as a production guide for both myself and the composer and sound design team, while also helping me track the progress of each shot.
The animation was created at 25 fps in a 1920 × 1080 resolution to meet the project requirements. I worked with a locked camera alongside a perspective camera, allowing me to animate freely while continuously checking the composition and performance from the audience's point of view. The animatic audio was also used as a timing reference throughout the animation process.
As shots were completed, I exported playblasts and regularly shared them with the composer and sound design team to support the development of the music and audio alongside the animation.
Rendering and Editing
For rendering, I used the Arnold renderer and experimented with different lighting setups to achieve the desired mood throughout the film. I wanted the lighting to gradually transition from the soft atmosphere of early morning at the beginning to a brighter noon and warm evening by the end of the story.
Before rendering the final shots, I first created several test renders to check the lighting and overall look, then proceeded to render the scenes as image sequences.
Once all the shots had been rendered, I imported the image sequences into Adobe Premiere Pro, where I assembled the film and synchronised the visuals with the final music and sound design. The completed film was exported at 25 fps in both MP4 and Apple ProRes formats to meet different delivery requirements.


Poster
I posed the Girl holding the gift, with stationery floating around her to hint at the magical element of the story. The poster was rendered as a PNG at a resolution of 4958 × 7016 for printing on A2 satin 260 gsm paper.
The finished poster was later exhibited as part of the UWE BA Animation Showcase during both the Private View and the Public View.